Instructions
and
FILES HERE <----------****
for MFP ( Multi Function Platform )
Accessories available separately
These instructions and files are for the
express purpose of creating one or
more paper model(s) of the MFP, and nothing
more . [Feel free to make up and/or submit
additional parts! -ed.]
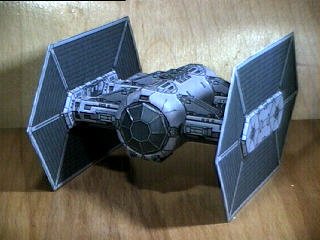
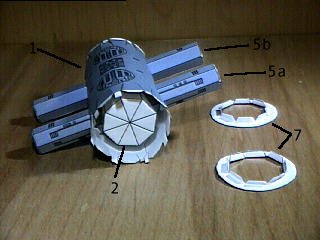
Parts 1 to 6 are the first parts to put
together . They make up the main core of the ship
(picture 1).
1

2
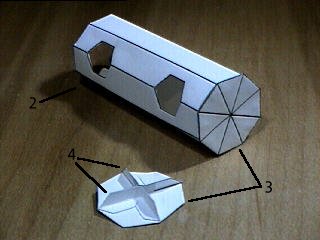
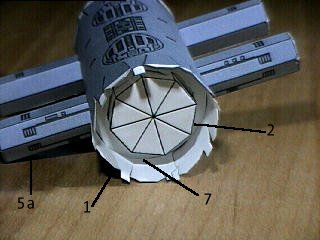
The end caps ( parts 3 and 4 , picture
2) are reinforced because a lot of things
get glued to it . The tabs for
the holes on the side of part 2 get
folded all the way back and glued down for
strength .
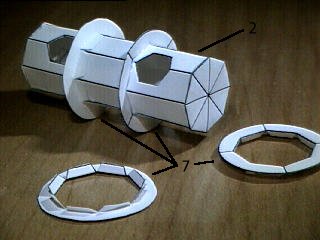
Glue the two center rings on, but not
the two outer rings ( picture 3 , part
7).
3
4
Look at picture 4, Aline the parts
! Slide the parts together (It helps to
clean up the ends of parts 5a and 5b ).
Glue the tabs inside part 1 and
then put the outer rings on (picture 5).
5
6

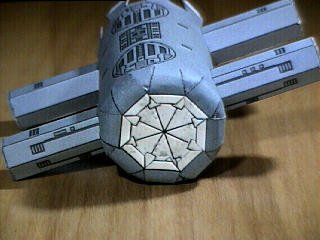
Glue down all the small flaps (picture
6).
Then glue down all the big flaps (picture
7).
7
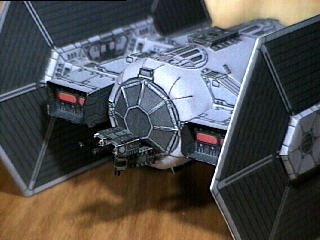
8
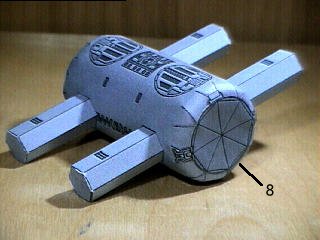
Glue on part 8 (picture 8) , one (part 8) on
each end . Now you have the main core finished
.
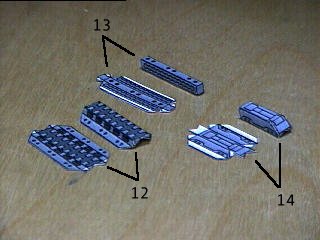
Glue parts 9 to 14 like in picture 9 and 10
.
9
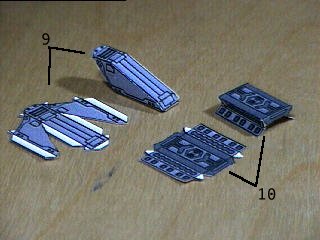
10
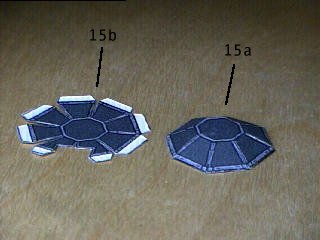
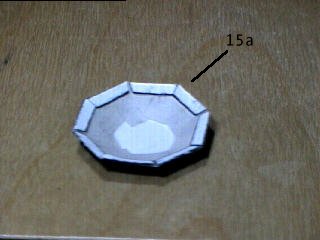
Glue the edges (parts 15a and 15b , picture
11) , and adjoin with newspaper tabs
(see picture 12) . Then glue the tabs of
parts 15a and 15b down over the newspaper,
creating strong straight edges.
11
12
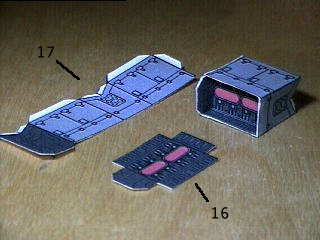
The folds on part 16 are inverted (folded
towards the printed side) . Part 16 fits
inside part 17 . When gluing part 17 to the main
core , the dark side goes towards the center
(picture 13) .
13
14
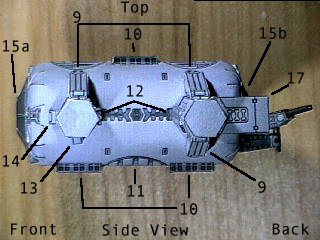
Picture 14 shows the placement of the parts 9
to 17 . Look at picture 22 ,it's a front view
.There are more reference pictures at the bottom
of these instructions .
The next few pictures are of the gun turret
.
The first 4 parts are toothpicks cut to size
( 2 of each size ) and colored black (picture 15 ,
parts 18a and 18b). I used a felt tip marker to
color them . Picture 16 show the two guns ,
use the larger toothpicks (parts 18a , picture 16)
for the gun barrels .
15
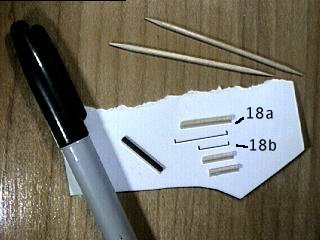
16

The two smaller toothpicks (parts 18b ) make
the gun support . Glue them together , then
glue part 20 around the end (picture 17) . Picture
18 didn't turn out so good , sorry .
17
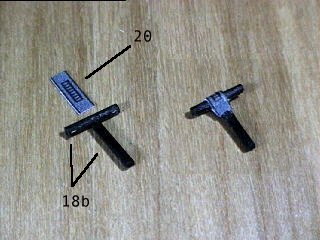
18
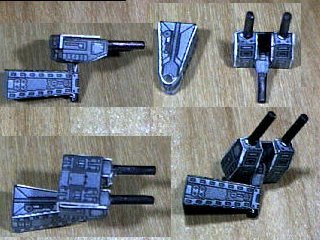
This is all the parts that make up the gun
turret assemblage (picture 19) . When gluing
DO NOT GLUE the gun support (parts 18b & 20)
to anything , everything pivots on this part .
Picture 20 shows several shots of the
assembled swiveling gun turret .
19
20
Look at picture 14 for placement of the gun
turret .
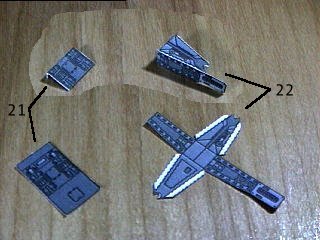
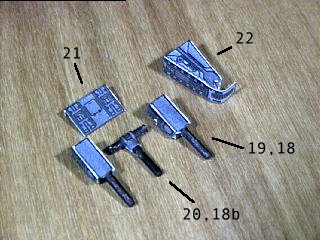
Small parts , sorry about this .
21
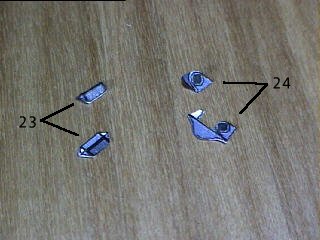
22
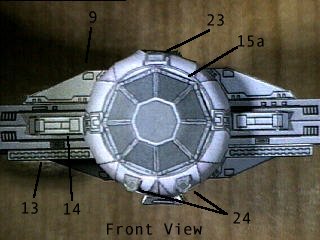
There are two parts 23 , one goes on the
front and one goes one the back . Parts
24 go on the front only
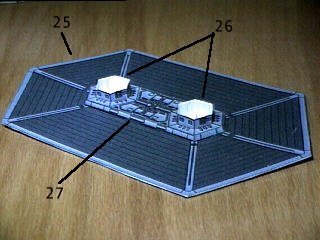
The solar panels , make two , one
for each side .
Don't use white glue to glue part
25 (picture 23), it warps real bad . A glue stick
seems to work well .
23

24
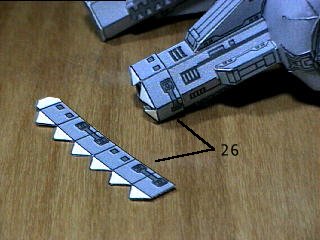
Glue part 26 around 5a/5b to fit it (picture
24),but DON'T GLUE IT ON ! It needs to
be removable .
Glue parts 26 down on to part 25 (picture 25)
. Don't glue the ship to the solar panel , it's
removable !
25
26
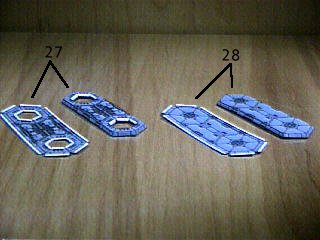
Parts 27 and 28 (picture 26) , fold the tabs
around the outside edge , all the way back
and glue down , to reinforce the short sides
.Then glue the edges of the short sides .
Remove solar panels from the main core ,
and glue on parts 27 to each panel (picture
27) .
27
28

Last part ! . Part 28 , glue it on and
you got your ship .
This is how it should look .
MFP
By Conrad Mitchell